
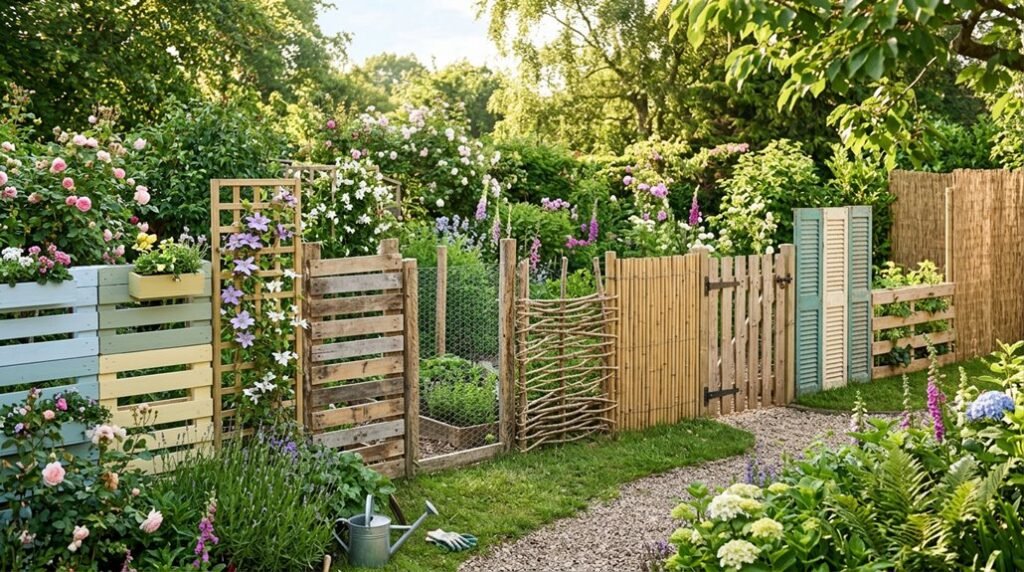
I’ve spent years testing budget-friendly perimeter solutions in my own garden, and I’ve learned that effective fencing doesn’t require expensive materials or professional installation. Whether you’re protecting vegetables from rabbits or creating privacy from neighbors, strategic DIY approaches using netting, reclaimed pallets, or concrete blocks can solve most problems for under fifty dollars.
The real challenge isn’t finding cheap options; it’s knowing which solution matches your specific site conditions, soil type, and local wildlife pressure. Let me show you how ten proven methods stack up.
Build a $30 Plastic Netting Fence for Raised Beds
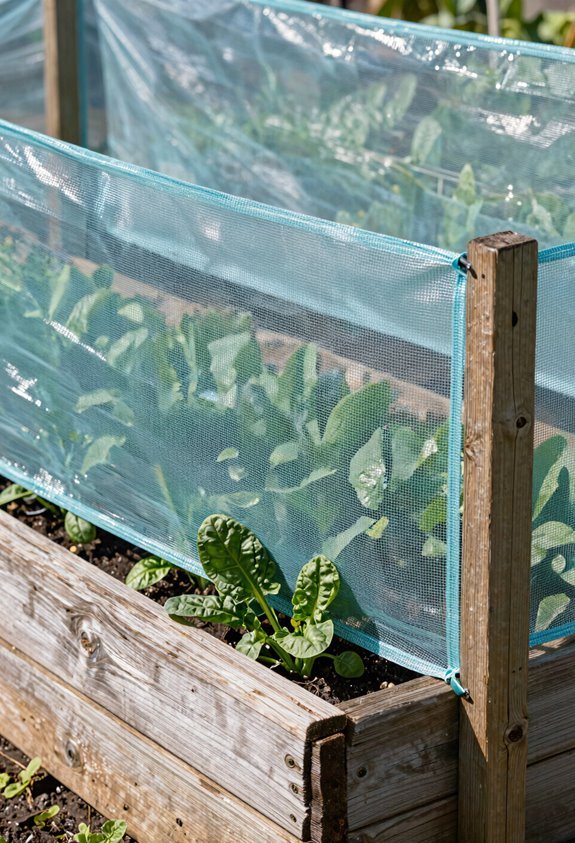
How do you protect your harvest without draining your wallet? I’ve built this exact plastic netting fence around my raised beds, and it works beautifully as budget fencing.
Budget fencing that actually works—I’ve built this plastic netting barrier around my raised beds, and it delivers serious protection without the serious price tag.
I start with twelve 1x1x72 inch stakes and one roll of 4, 5 foot plastic netting. This DIY fence costs under $30, yet delivers serious protection.
I staple the netting to alternating stakes, keeping the bottom 10, 12 inches unsecured. This anchor zone buries flush against soil for ground contact stability. I measure perimeter lengths before cutting, so each section pulls taut without sagging. Hammering stakes fully creates aligned, continuous sections.
When I need entry, I pull one stake and lift the netting. Reinserting restores my reusable barrier instantly. Fellow gardeners, this approachable system welcomes you into sustainable growing without complication or high costs.
Stack Concrete Blocks for a No-Dig Garden Fence
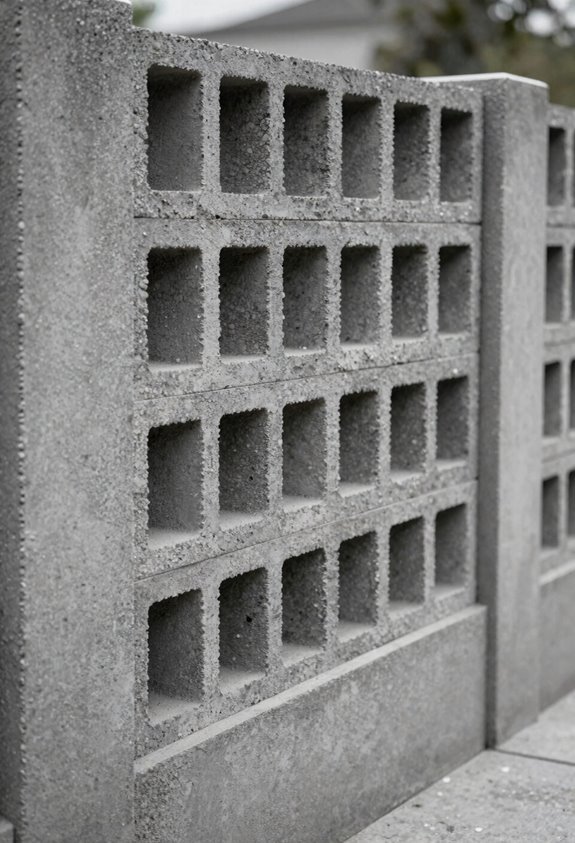
I stack standard concrete masonry units in running bond to build quick, relocatable bed perimeters without breaking ground. You’ll want to select solid or hollow-core blocks rated for outdoor exposure, checking corners for chips and ensuring uniform dimensions so courses stay level without mortar.
Lay your first course directly on compacted soil, stagger vertical joints in subsequent rows, and cap at 24 to 32 inches; adding rebar if you’re going taller.
Material Selection Tips
A concrete block fence starts with choosing the right unit for your build, and I’ll walk you through what I’ve learned matters most. I go with hollow-core blocks when I want lighter stacked-blocks that won’t strain my back during a weekend project, though solid blocks deliver serious durability if privacy tops your list.
Standard 8x8x16 dimensions shape your fence height, so I measure my perimeter twice before buying. For that clean no-dig appearance, I skip mortar and rely on landscape-adhesive between rows; it keeps everything aligned without heavy excavation. I finish with cap-blocks or a thin veneer along the top edge, which prevents soil from escaping your raised beds while improving the whole look. Local prices fluctuate, but I’ve found these materials run budget-friendly across most regions.
Installation Process Steps
The no-dig method begins with laying the first course directly on level ground, no trenching required. I place standard cinder blocks end-to-end, checking each one with a spirit level to maintain level alignment across the entire span. This foundation determines your fence installation success, so I take my time here.
For your garden fence, I stack subsequent courses in a running bond pattern, staggering joints for stability. If I’m building a longer barrier, I work in manageable sections, completing one before moving forward. Hollow-center blocks accept rebar and mortar when I need extra strength, though dry-stacking suits most residential needs.
I select 8x8x16 inch cinder blocks for consistent sizing, sealing exposed surfaces to create a durable, low-maintenance fence that resists moisture damage. The result is a solid, professional boundary without excavation headaches.
Repurpose Wood Pallets Into a Planter-Ready Garden Barrier
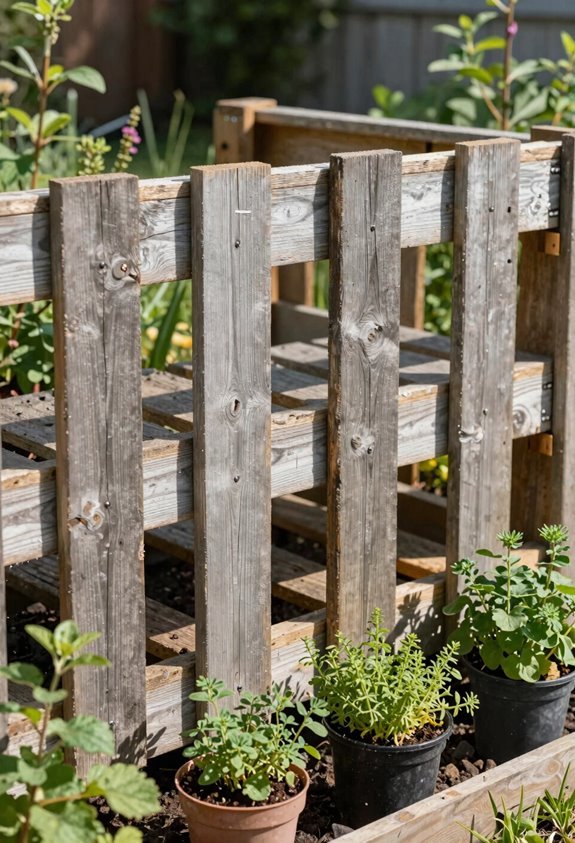
I’ve found that sourcing heat-treated pallets marked with the IPPC logo from local warehouses gives me sturdy, pest-resistant material without spending a dime. You can stack them whole for quick modular assembly with T-posts and screws, or deconstruct them into pickets for a custom look that fits your space.
Either way, the slatted design practically invites you to tuck herbs and trailing flowers between the boards, turning your boundary into a living vertical garden.
Pallet Sourcing Tips
Where do you find quality pallets without draining your project budget? I’ve discovered local construction companies and warehouses often donate surplus pallets, making sourcing free or incredibly low-cost for DIY fencing. When I’m scouting, I always check for the IPPC stamp. This mark means pallets are heat-treated (IPPC) rather than chemically treated, protecting my garden from pests and diseases.
| Source | What to Ask |
|---|---|
| Construction sites | “Do you discard pallets?” |
| Warehouses | “Can I take unwanted stock?” |
| Hardware stores | “When do shipments arrive?” |
| Online marketplaces | “Are these heat-treated?” |
Stick to HT-marked pallets for safe, sustainable DIY fencing. Your budget stays intact, and you’ll join countless makers transforming waste into beautiful garden boundaries.
Assembly Methods
Why settle for a plain barrier when your fence can multitask as a living wall? I build my pallet fence by driving T-posts into the ground, then sliding pallets between them one by one. I secure everything with screws for rock-solid stability. These assembly methods turn free materials into a sturdy DIY fence that looks intentional, not improvised.
I always check for the IPPC logo on my pallets, since heat-treated wood prevents pests from hitching a ride into my garden. For my budget fencing project, I sometimes pull pallets apart for a picket-style garden barrier, or I keep them whole for fuller panels. Either approach works.
A quick paint finish protects the wood while we wait to add our vertical garden elements.
Planter Integration Options
Three strategic cuts transform a standard pallet into a planter-ready garden barrier that works twice as hard for your budget. I stack donated pallets as-is for instant DIY garden fencing, or pull them apart for taller picket-style edges with built-in growing room. You’ll want to check for the IPPC logo; this marks heat-treated wood that prevents pest transfer, keeping your plants safe.
My favorite approach combines sturdy barrier function with planter integration, tucking herbs and peppers between slats while maintaining structure. A quick paint finish improves the look, but the real payoff comes when you embrace vertical garden techniques. Cascading flowers or trailing greens turn your pallet fence into living architecture. This solution proves resourcefulness belongs in every garden, delivering boundaries and harvests from one smart material choice.
Build a Wood-and-Chicken-Wire Garden Fence
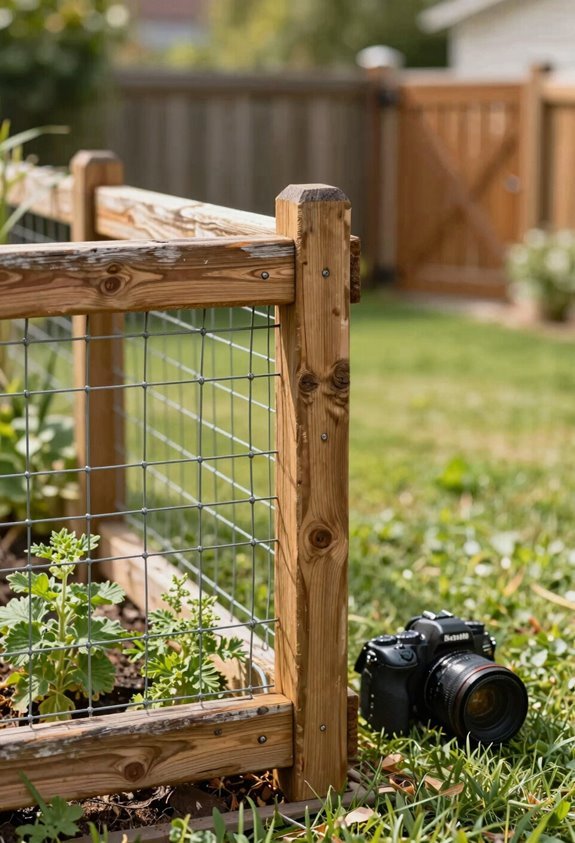
How can we keep rabbits out without emptying our wallets? I’ve found that a wood-and-chicken-wire garden fence offers the perfect balance of affordability and effectiveness for any budget-minded DIY enthusiast.
I start with simple materials: twelve wood stakes, each 1x1x72 inches, plus a generous roll of chicken wire reaching 4-5 feet tall. Before cutting anything, I measure my raised bed perimeter carefully, planning modular sections that stretch 5-6 feet each for optimal tautness.
Here’s my method: I staple the chicken wire to one stake, pull it tight to the next, and repeat. Leaving 10-12 inches at the bottom lets me anchor securely underground. When I need access, I simply lift the wire after removing a stake, then reinsert it for seasons to come.
Weave a Wattle Fence From Flexible Branches
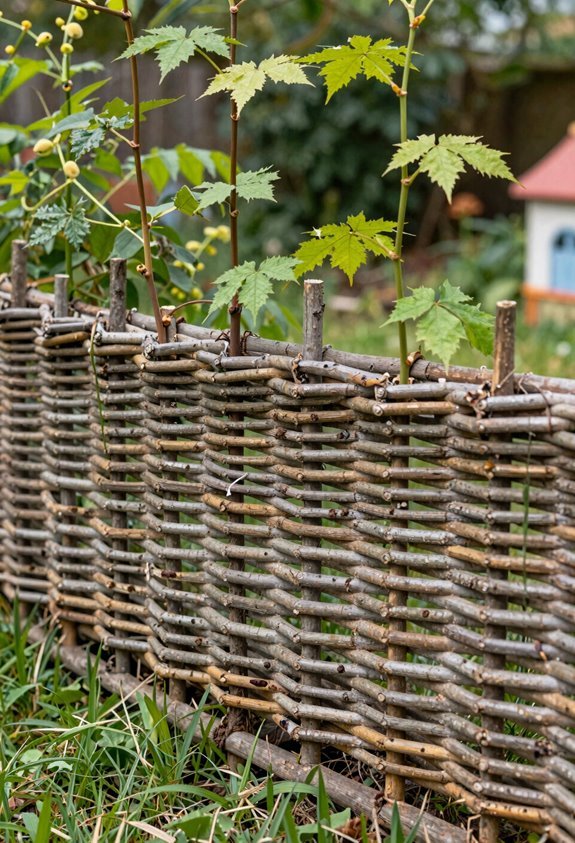
While chicken wire keeps pests at bay, I’m drawn to solutions that honor older, simpler building traditions. When I weave a wattle fence, I’m connecting with artisans who built this way for roughly 6,000 years.
Chicken wire works, but weaving a wattle fence connects me to 6,000 years of artisans who built simpler.
I start by driving stout wooden posts into the ground, keeping my post spacing tight at one to two feet. This interval creates the tension my woven barrier needs.
For the weave itself, I seek flexible branches: willow or hazel performs best, cutting green wood about one to two inches thick and four to six feet long. I thread these flexible branches horizontally through the uprights, alternating front and back to lock each course firmly. No nails, no wire, no hardware whatsoever; friction and tension do the work.
The resulting rustic fence suits naturalistic gardens beautifully, blending quietly with its setting while costing almost nothing.
Grow a Vine-Covered Trellis as a Living Garden Fence
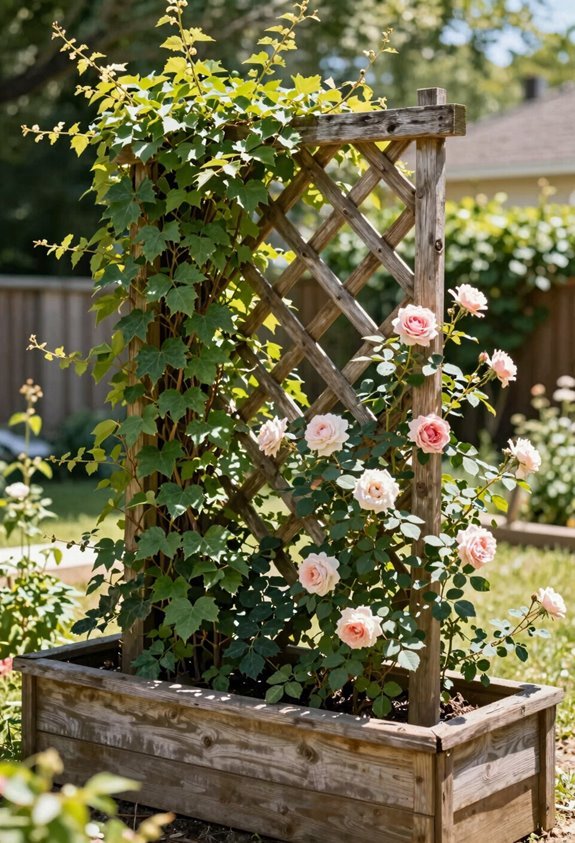
I think a vine-covered trellis offers one of the most graceful ways to build a living privacy screen that breathes and grows alongside your garden. You’ll find fast-growing options like grape, kiwi, or even climbing zucchini establishing vertical coverage within a single season, though I’d warn you that this living architecture demands thoughtful seasonal maintenance to keep its form.
While the initial cost stays pleasantly low compared to solid paneling, remember you’re investing in a boundary that filters light beautifully but won’t contain an enthusiastic dog or deter determined wildlife.
Living Privacy Screen
Why settle for a static barrier when I can cultivate one that breathes, blooms, and evolves with the seasons? I’m building a living privacy screen by mounting a trellis to my existing fence, then training climbing plants upward. This budget-friendly approach turns ordinary boundaries into dense vertical gardens without expensive materials.
Morning glories and star jasmine create informal screening while expanding my growing space skyward. I select adaptable climbers suited to my climate and sun exposure, ensuring year-round greenery. The trellis structure supports pollinators, adds seasonal color, and develops character over time.
Integrating planters at the base enhances texture, turning a simple framework into a versatile vertical garden that belongs uniquely to my landscape.
Fast-Growing Vine Options
Selecting the right climbers determines how quickly my living screen fills out and performs. I favor fast-growing vines like morning glories or star jasmine for my trellis-backed living fence, since they establish privacy within a single season without demanding heavy upfront investment.
I build my framework using in-ground posts and lightweight materials, keeping this affordable fencing accessible even on tight budgets. The vertical design maximizes coverage while minimizing ground space, which matters when every square foot counts.
I also experiment with productive climbers, grapes, kiwis, or zucchini, transforming my trellis into a functional green wall that shades neighboring beds. By matching varieties to my local climate and sun exposure, I make certain of vigorous establishment and seasonal rewards.
This approach delivers greenery, fragrance, and seclusion through simple, repeatable techniques we can all adopt.
Seasonal Maintenance Needs
How do I keep a living fence healthy through every season? I tackle maintenance with a steady rhythm that rewards my efforts. I started with drought-tolerant climbers, and now my trellis demands consistent attention as those vines mature.
Snarled canes twist through gaps, choking the slats until sunlight gasps for entry. Fresh tendrils spiral upward after rain, green fingers tracing the wires I secured last spring. Hinged panels swing open, revealing beans or tomatoes, while bees hum in the humid pocket below.
I prune quarterly, cutting dead growth to let air move through. I check ground anchors when seasonal shifts loosen soil. This living fence belongs to every season, and with disciplined care, it belongs to me too.
Choose a Low Picket Fence for Garden Borders
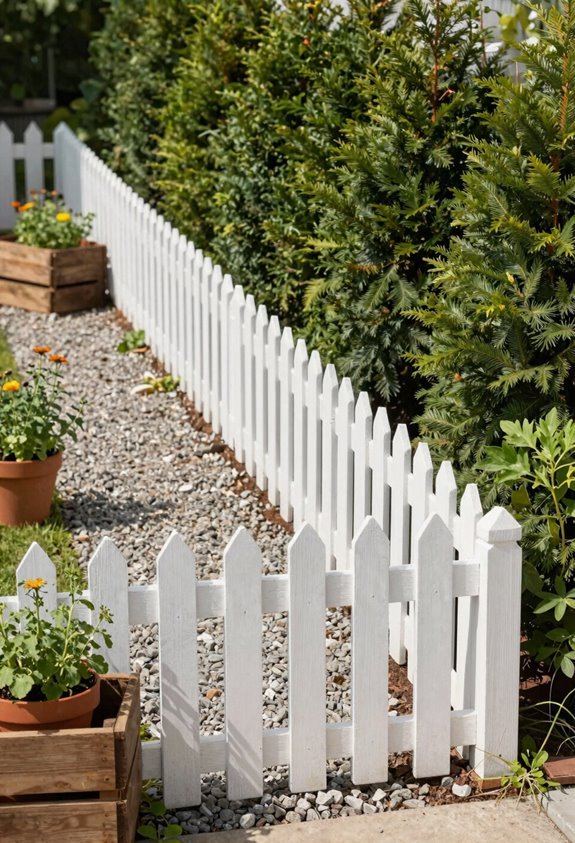
A low picket fence offers an affordable, attractive way to define your garden borders without breaking the bank. I’ve found this budget fence style delivers serious visual appeal at roughly $17–25 per linear foot, making low-cost fencing accessible for most homeowners.
A low picket fence offers an affordable, attractive way to define your garden borders without breaking the bank, typically running $17–25 per linear foot for most homeowners.
When I install a picket fence as a garden border, I space pickets one to three inches apart on sturdy rails. This open design honors that classic American aesthetic while keeping installation simpler and cheaper than solid privacy alternatives.
You can customize the tops to match Colonial, Georgian, Cape Cod, or Craftsman architecture, so your yard feels connected to something timeless. Maintenance stays manageable with periodic painting or staining.
For me, that small effort preserves the pickets and keeps the whole look cohesive, so your garden border remains welcoming for years.
Create a Scalloped Picket Fence for Custom Style
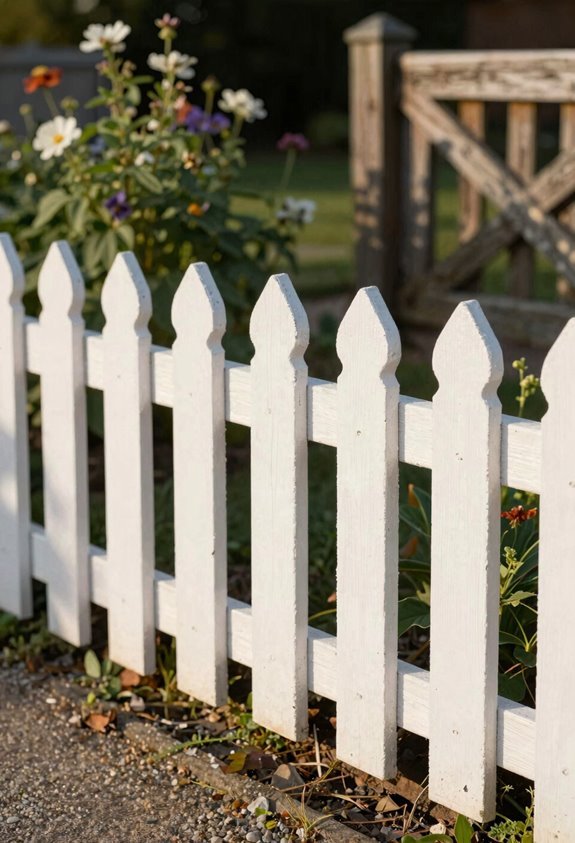
Why settle for straight lines when you can add gentle curves to your garden border? I love how a scalloped fence turns an ordinary picket fence into something that feels personal and inviting, like you’re creating a space that truly belongs to you.
This DIY fence project keeps costs manageable because you’re working with standard wood pickets and rails, just cutting them in stepped, curved intervals. It’s budget-friendly fencing that doesn’t sacrifice character.
Picture this:
- Morning light tracing each gentle arc along your property line
- Neighbors pausing to admire the undulating silhouette from the sidewalk
- Your Craftsman or Colonial home gaining instant cohesion with its surroundings
With simple cuts and careful spacing, you achieve custom style without custom prices. This approach proves that distinctive character for your home stays within reach when you rely on your own hands.
Upgrade a Chain-Link Fence With Paint and Plants
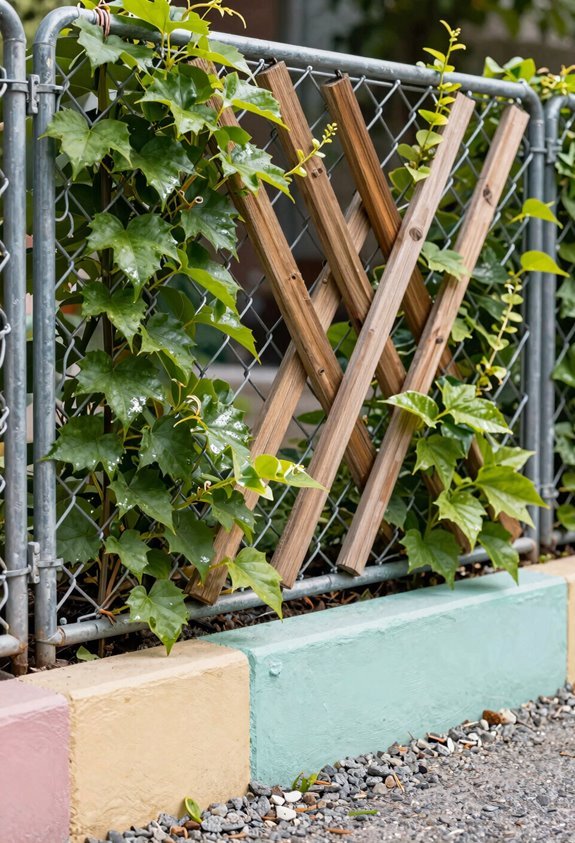
That utilitarian chain-link fence surrounding your yard doesn’t have to remain an eyesore you’re simply stuck with. I’ve changed plenty of these metal barriers into inviting boundaries that actually make neighbors stop and chat.
| Upgrade Element | Budget Impact |
|---|---|
| Paint with oil-based exterior coating | Refreshes weathered mesh affordably |
| Wooden sleeves on posts | Conceals industrial edges warmly |
| Climbing plants like ivy | Builds natural privacy over seasons |
I start by slipping wooden sleeves over each post, sometimes adding horizontal slats for a two-sided finished look. Then I apply quality paint or a vinyl coating that stands up to sun and rain.
Finally, I plant climbing plants behind the chain-link fence, letting greenery weave through for soft privacy without sacrificing durability. It’s your space; make it feel like home.
Add Solar Lighting to Your Garden Fence
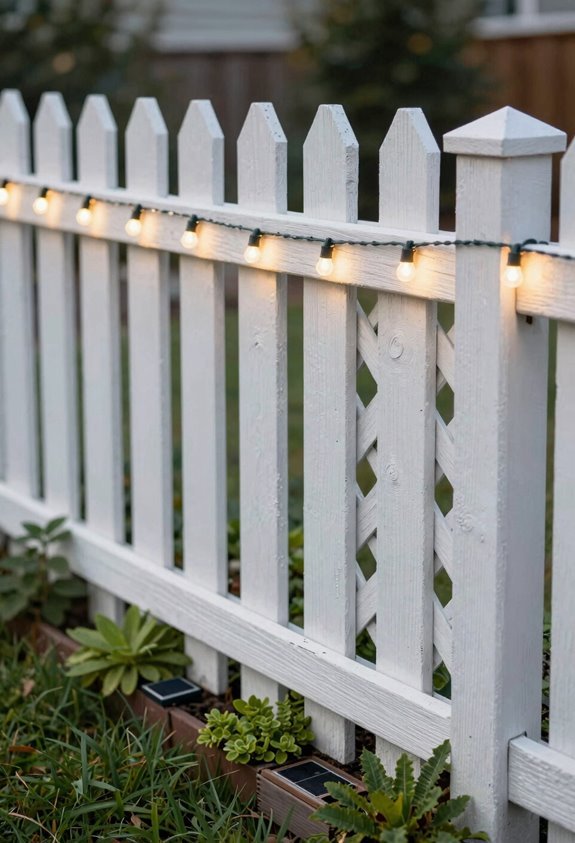
How much more inviting could your evening garden feel with a soft glow tracing every fence line? I think we’d all love a space that welcomes us home after sunset, and solar lights make that possible without touching your wiring or wallet.
Solar lights trace every fence line, welcoming you home after sunset—no wiring, no extra cost, just warm evening glow.
I install energy-efficient LED units along my fence line, spacing them evenly to define boundaries and boost safety. These outdoor lighting options charge by day and glow by night, demanding almost nothing from me afterward.
I always choose weatherproof models rated for my climate, checking lumens and battery reliability before buying.
- Warm pools of light gathering where neighbors linger to talk
- Shadows dancing along pickets as evening settles in
- A clear path home, visible even on moonless nights
This simple upgrade changes my garden into a shared refuge.





