
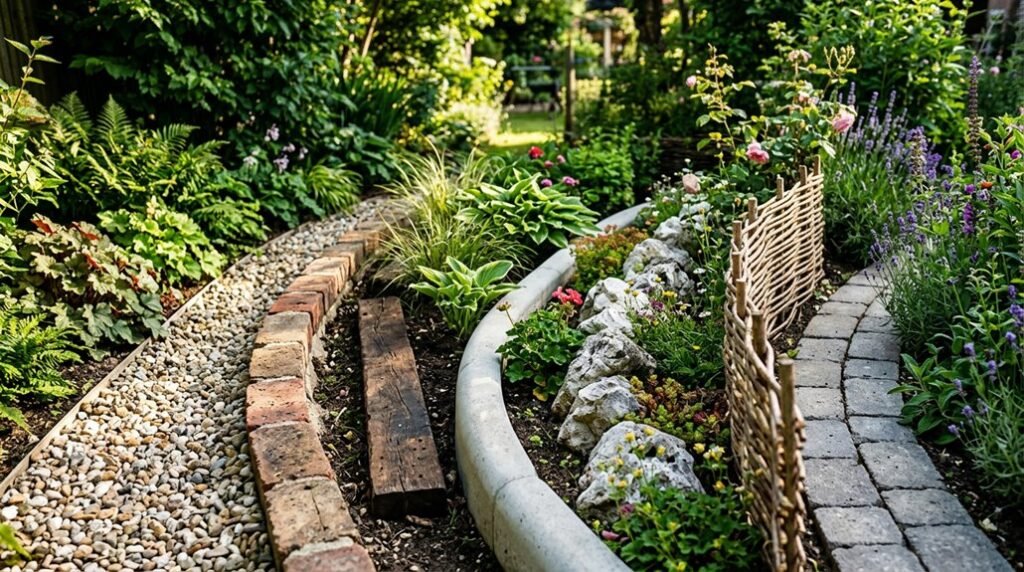
I’ve spent years refining garden edges on tight budgets, and I’ve learned that expensive-looking results rarely require premium materials. The secret lies in understanding how texture, repetition, and patina create visual weight.
Whether you’re working with salvaged brick or raw steel, the right technique changes humble elements into deliberate design statements. I’ll show you seven approaches that deliver architectural impact without the showroom price tag, starting with resources you might already have on hand.
Use Fallen Logs for Free Natural Garden Edging
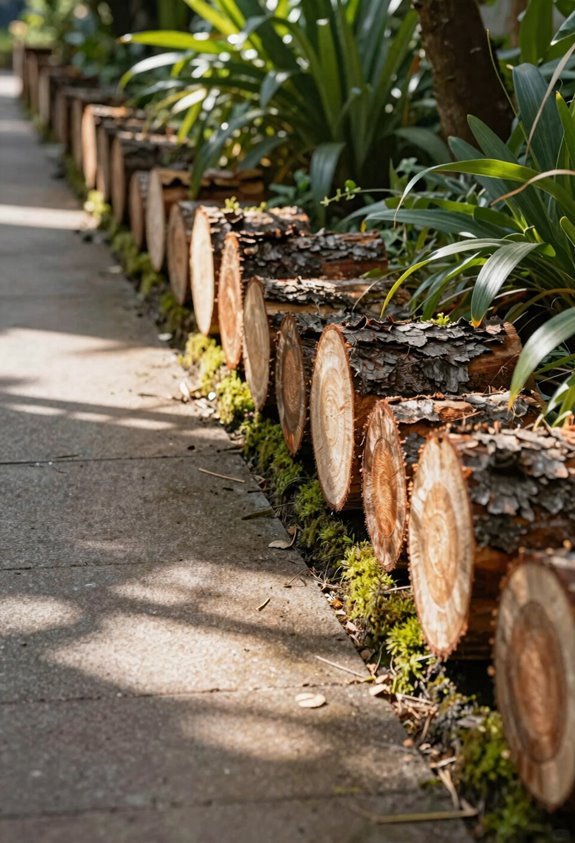
When I’m scouting for garden edging that won’t drain my wallet, I head straight to the nearest wooded area or ask neighbors about downed trees. Fallen logs become beautiful natural edging with minimal effort, and you’ll feel connected to a community of resourceful gardeners who value sustainable choices.
I slice sections into uniform heights, then trench shallow grooves so each piece sits level. A rustic border emerges as I set them end to end, anchoring with soil or stakes to prevent shifting. Cedar, black locust, or aged oak extend your low-cost landscape investment, while softwoods demand earlier replacement.
This natural edging traps debris, defines beds crisply, and harmonizes with mulch and plantings. I clear brush occasionally and reseat settled logs after heavy rains. The result feels intentional, not improvised.
Upcycle Glass Bottles Into Colorful Bed Borders
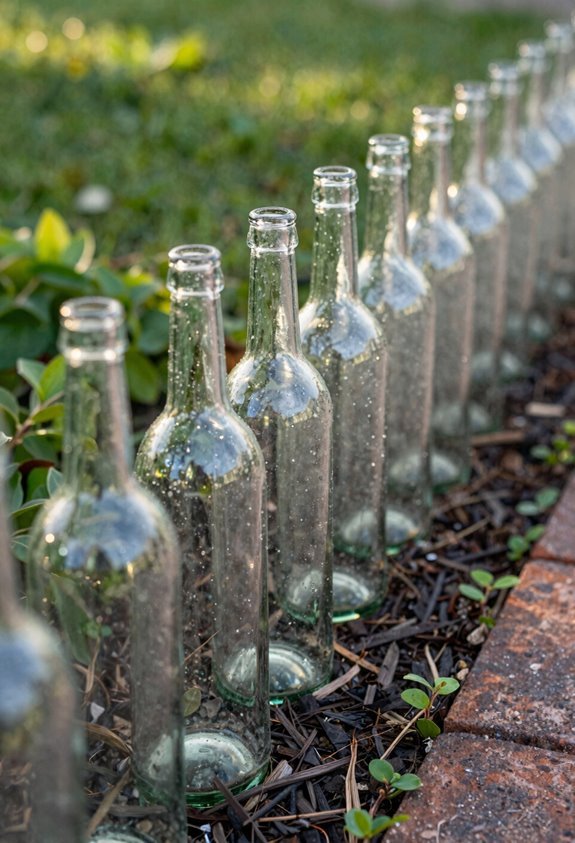
I transform discarded glass bottles into colorful bed borders by selecting sturdy, thick-walled varieties in coordinating hues, then burying them neck-down at consistent depths to establish a stable, continuous edge. You’ll want to space each bottle roughly six inches apart, ensuring the shoulders sit flush with soil level for clean lines and structural integrity.
Proper installation prevents frost heave and impact damage, so I’ll walk you through the specific techniques that keep this upcycled edging crisp season after season.
Bottle Selection Tips
Why settle for store-bought edging when your recycling bin holds the makings of a striking border? I’ve found that upcycled bottles work well as glass borders when you choose wisely. Start by gathering bottles in sufficient quantity; consistency matters more than perfection here.
For edging materials, I prefer wine bottles for their uniform height, though beer bottles work nicely for shorter beds. Consider your color patterns carefully: solid rows create formal elegance, while alternating hues build playful rhythm. Clear bottles brighten shadowed corners through light reflection, and dark amber or green glass absorbs warmth, subtly shifting your bed’s microclimate. Avoid chipped rims entirely; bury them fully to prevent injury. With thoughtful selection, these discarded containers change into polished, eco-conscious boundaries that add character to your garden without draining your wallet.
Installation Technique Basics
How do you turn a pile of empties into a crisp garden perimeter? I start by digging a trench along my bed line, then I place clean, dry bottles upside down with necks flush to the soil. I tap each one gently with a rubber mallet until I’ve got that continuous, jagged edging locked in tight.
For visual punch, I’ll alternate colors or run a repeating pattern; it’s still upcycling, but it looks intentional, not accidental. I bury each bottle about halfway so the edge reads clearly from the path without shouting for attention. That partial depth also steadies the row against shifting.
Maintenance stays simple: after mowing or tilling nearby, I walk the line, replanting any displaced bottles before the gap spreads. Season after season, the border holds.
Weave Willow Branches for Flexible, Low-Cost Bed Lines
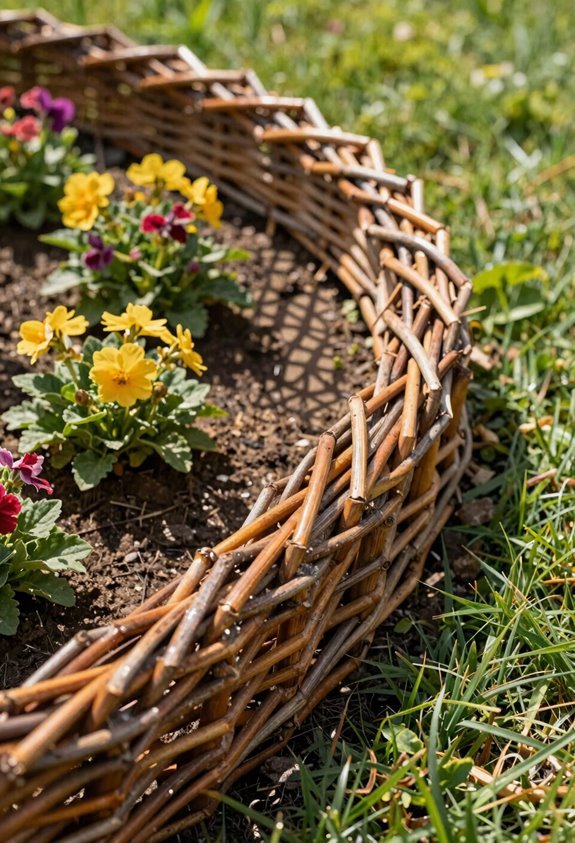
I love how woven willow branches, or wattle, bring that effortless English garden charm to any bed line without demanding heavy machinery or deep pockets. You simply hammer these flexible rods into place, creating soft, organic boundaries that flow naturally around curves and corners.
The installation feels almost intuitive, and the result harmonizes beautifully with drought-tolerant plantings or rustic cottage schemes.
Natural Aesthetic Appeal
Where else can you find edging that bends to your garden’s will without emptying your wallet? Willow edging delivers exactly that flexibility, weaving natural aesthetics into every curve of your cottage gardens. I love how this budget-friendly edging creates soft, organic boundaries that feel like they’ve always belonged in the landscape.
The rustic texture blends seamlessly with stone pathways, gravel walks, or wooden decks, building that cohesive look we all crave. Unlike rigid metal or plastic borders, willow breathes with your garden, suppressing weeds while letting moisture pass through. It complements drought-tolerant plantings beautifully, offering a subdued palette that whispers rather than shouts.
For gardeners seeking connection to traditional techniques, this method roots you in something timeless. The worn, weathered character only deepens the appeal, proving that authentic style needn’t cost a fortune.
Simple Installation Process
Why struggle with rigid borders when you can shape your garden’s edge exactly as you envision? I love how Willow edging invites us into a project that feels both creative and achievable, even for newcomers to the craft. This DIY edging demands minimal tools and rewards with instant transformation.
For quick installation, I gather these essentials:
- Pre-cut willow bundles or online-sourced branches
- A sturdy mallet for anchoring
- Protective gloves for comfortable handling
- A shallow 2, 3 inch trench for secure placement
- Prepared soil around established bed lines
I hammer slender branches into place, weaving as I go to form my rustic border. The flexible stems bend gracefully around curves. It blends with mulch, suits naturalistic themes, and needs only periodic re-tightening through the seasons.
Layer River Rocks Over Mulch for Xeriscape Edging
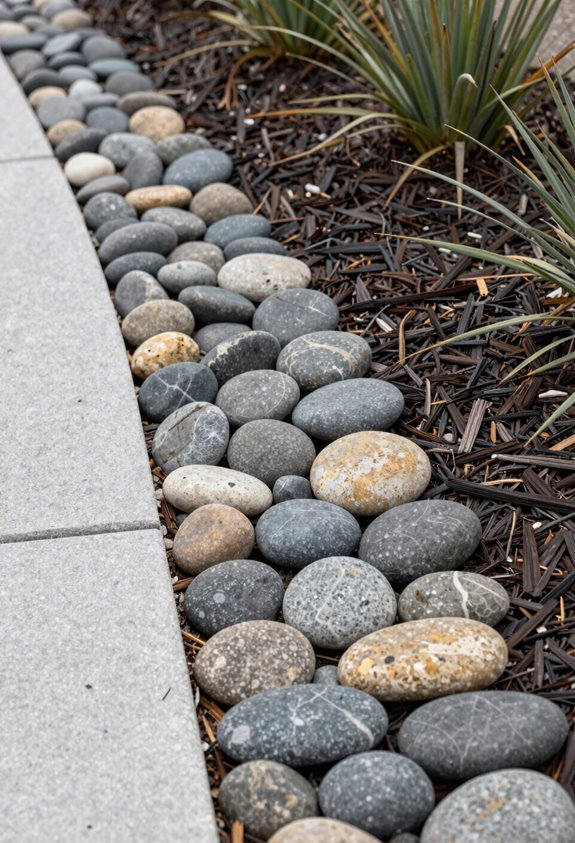
How do you create a polished, drought-tolerant border without breaking the bank? I layer river rocks over mulch, and suddenly my xeriscape edging looks intentional, not improvised.
I’ll grab smooth, rounded river rocks, two to four inches across, because they nestle into the landscape like they’ve always belonged there. I spread an inch or two of mulch first, then settle the stones right on top, keeping them slightly below grade so weeds don’t crash the party. Browns, grays, taupes; those muted tones play nicely with every sage and sedum I’ve planted.
For stability, I stagger the rocks or dig a shallow trench. No shifting when I edge past with the hose, no sliding underfoot. This mulch-and-rock combo gives me that curated dry-garden look the neighbors will want to replicate.
Press In Metal Edging Strips for Clean Modern Lines
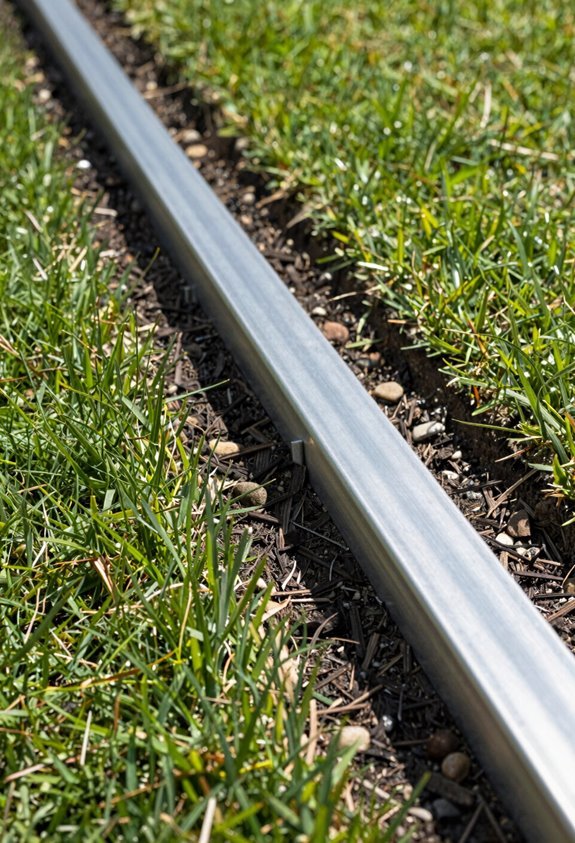
River rocks lend an organic, weathered charm, but sometimes I want something sharper, more architectural. That’s where press-in edging reshapes my garden into a curated space with intentional design.
Metal edging delivers exactly what contemporary landscapes need: slim profiles that disappear into the terrain while maintaining crisp boundaries. I install these strips flush with soil level, creating modern borders that feel both precise and understated. The powder-coated or galvanized steel bends gracefully around curves yet holds its shape, giving me professional results without professional labor.
Here’s why this solution works for design-minded gardeners:
- Creates seamless transitions between lawn and planting beds
- Resists corrosion through harsh seasons
- Installs quickly with minimal excavation
- Maintains mulch and gravel containment
- Refines ordinary yards into cohesive outdoor rooms
Clean lines don’t require extravagant spending, just smart material choices.
Lay Salvaged Bricks Herringbone-Style for Classic Borders
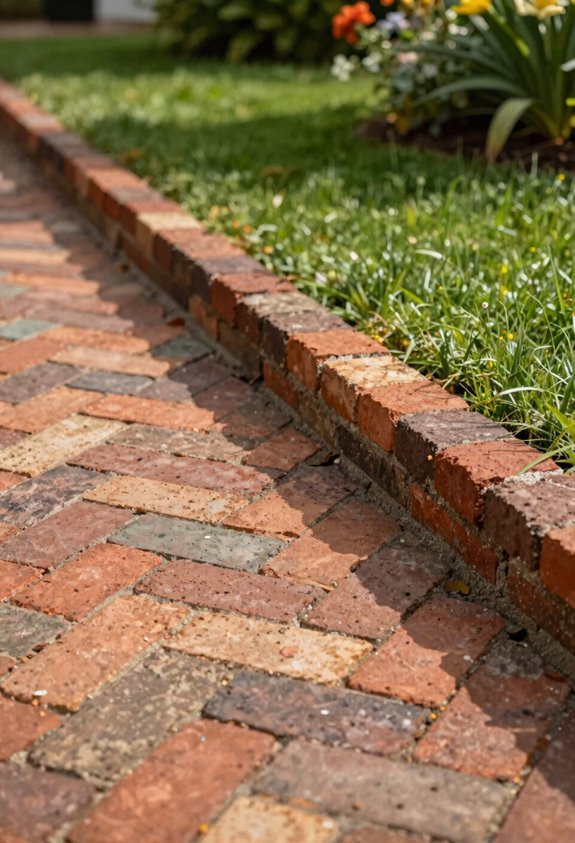
Where else can I find weather-worn character at a fraction of retail cost? I turn to salvaged bricks for an edging border that whispers heritage without shouting debt.
When I lay them in a herringbone pattern, alternating each brick at 45 degrees, I create that continuous zigzag that locks together like community, each piece essential, none replaceable. This interlacing edge grips soil and gravel firmly, preventing washout while elevating my garden’s profile.
Cost-effective landscaping rarely looks this intentional, yet here we are. I dig my trench level, compact the base thoroughly, and watch straight lines emerge through patience. I sometimes seal the surface for longevity against frost heave and stains. Together, we’re building borders that outlast trends and welcome generations.
Rust Mild Steel to Mimic Corten for Custom Metal Borders
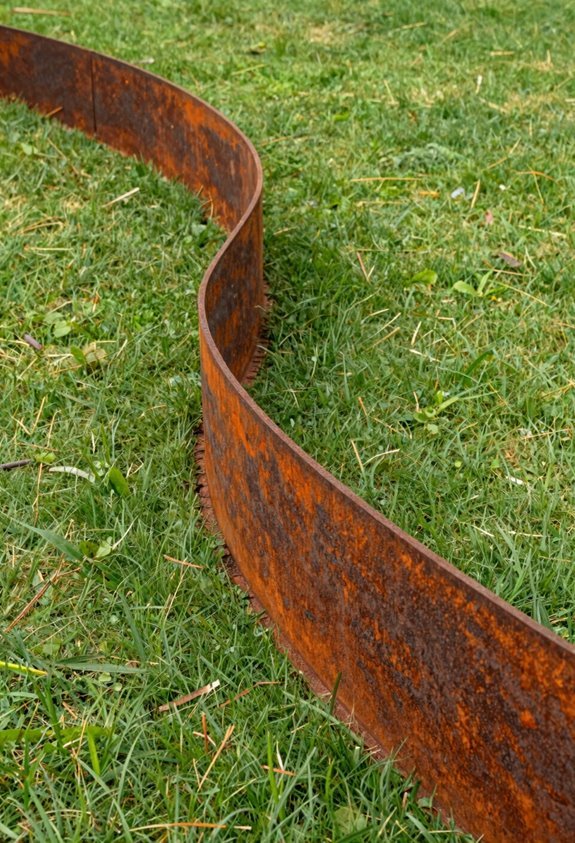
Bricks carry history, but steel carries possibility. I found that rusting mild steel delivers that coveted corten-look without draining my wallet. The warm, earthy patina changes ordinary edging into landscape architecture.
Steel carries possibility—mild steel rusted to that coveted corten-look, turning ordinary edging into landscape architecture without draining the wallet.
Here’s how I make it work:
I choose bendable mild steel for curved borders that follow my garden’s natural flow. I expose raw steel to weather, letting nature paint the surface over weeks. I apply clear sealant when I want to freeze the color at its peak. I source pre-rusted panels for instant gratification on weekend projects. I touch up worn spots annually to maintain that rich, weathered character.
This edging anchors my beds with industrial soul. The rust evolves, but the structure holds strong. I’ve found my place among makers who value process over perfection.





