
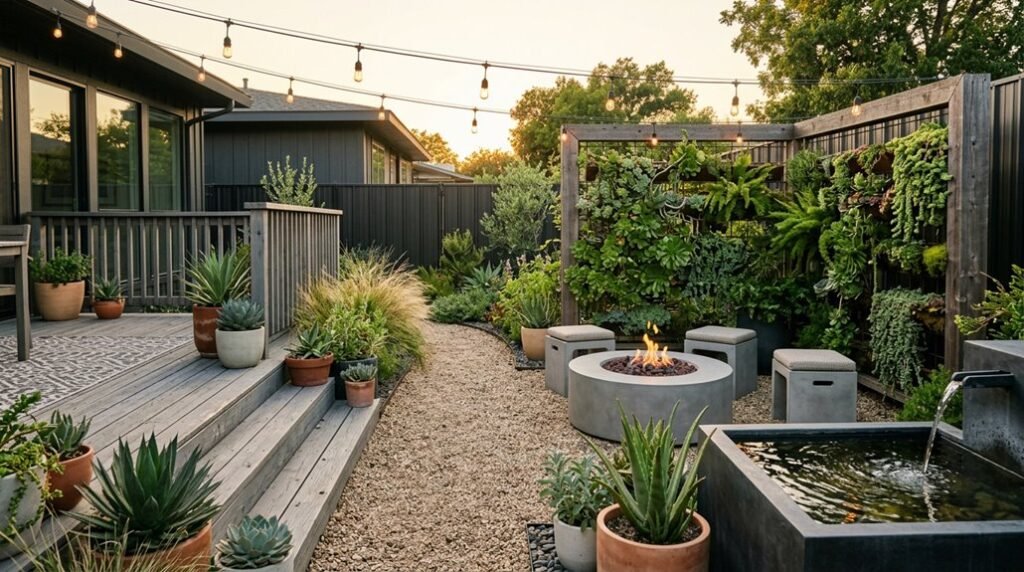
I’ve transformed my own patch of Georgia clay into a grass-free retreat without draining my savings, and the principles translate anywhere. Native groundcovers like creeping thyme and dwarf mondo grass replaced my thirsty lawn, cutting water bills by sixty percent while building soil health through layered organic mulch.
The real revelation came when I stopped fighting my yard’s natural conditions and started exploiting them: xeriscaping isn’t surrender, it’s strategic advantage. You don’t need a landscape architect or premium materials to execute this shift. I’ll show you ten approaches I’ve pressure-tested, from permeable hardscaping that manages stormwater to wildlife corridors that cost less than a single season of lawn maintenance. The first solution starts with what you’re already growing.
Start With the Cheapest: Native Plants Replace Your Lawn
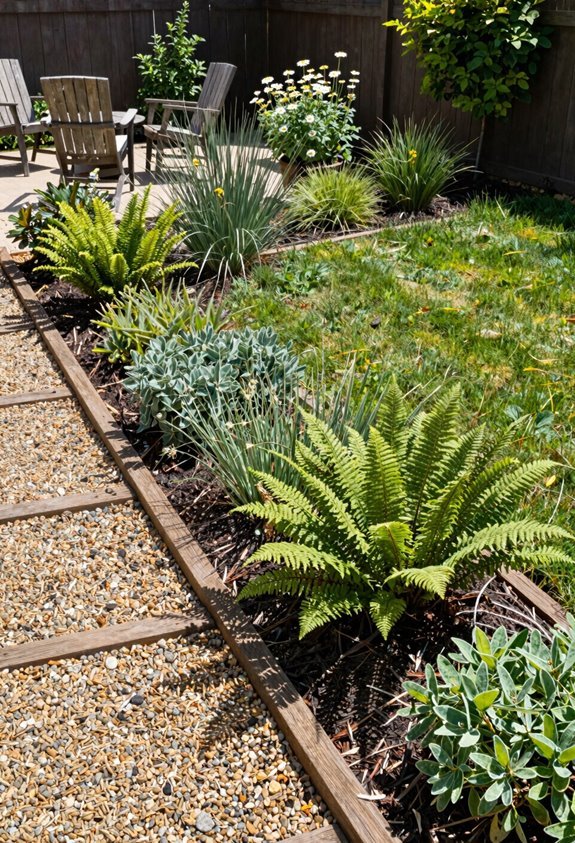
Why spend a fortune on turf you’ll fight to maintain? I’ve discovered native plants change my yard into something extraordinary without draining my wallet or weekends. These locally adapted species do well in Georgia’s climate, eliminating constant watering and chemical fertilizers. I’m talking about drought-tolerant landscaping that actually works.
When I swapped my lawn for a diverse mix of native flowers, shrubs, and trees, I created year-round visual interest that supports local pollinators and wildlife. My upfront costs stayed minimal because I started with simple sketches and selected region-appropriate species. Layering mulch improved moisture retention, reducing maintenance further.
Native plants build community connection through shared environmental stewardship. You’ll belong to something meaningful while saving money.
Lay Gravel Ground Cover That Outlasts Mulch
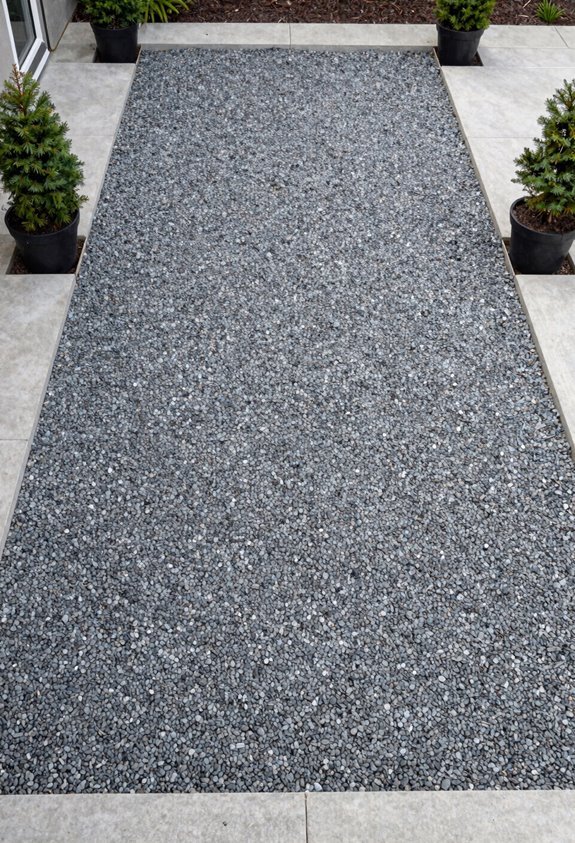
Native plants transformed my yard, but I still needed solid ground for my patio furniture and fire pit. I chose a gravel patio as my ground cover solution, and it’s proven far more durable than mulch ever could.
Permeable gravel drains beautifully, eliminating puddles while recharging groundwater beneath my small yard. I laid landscape fabric first, then added angular crushed gravel for stability, finishing with river stone borders that catch the eye.
This ground cover suppresses weeds and withstands Atlanta’s climate without constant replacement. My furniture sits steady, rainwater filters through the joints, and runoff stays minimal. I used metal edging to keep everything contained, mixing textures for a polished look that feels intentional, not improvised.
You’ll find this approach creates lasting value without professional installation.
Build a Paver Patio Without Professional Help
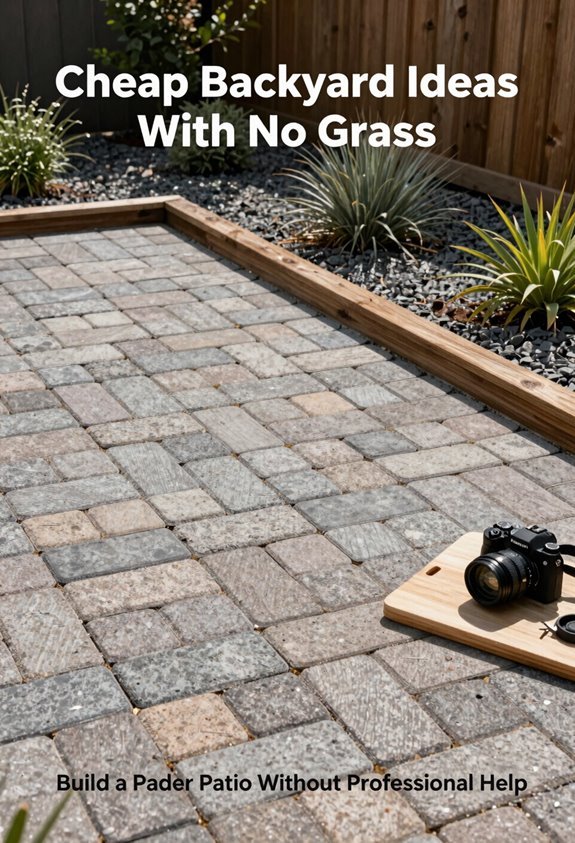
I built my own paver patio last spring, and I’ll walk you through planning your layout, choosing materials wisely, and following installation best practices so you can tackle this project with confidence.
You’ll map your space with string lines and stakes, select permeable pavers or standard concrete options that fit your budget, and prepare a compacted gravel base that prevents shifting over time. With proper edging restraint and consistent joint spacing, you’ll create a level, durable surface that improves your yard without the cost of professional labor.
Planning Your Layout
Though your yard may feel cramped or uneven now, I’m confident you can map out a paver layout that turns it into usable square footage without hiring contractors. I start by measuring your available space, then sketch a simple design that echoes your home’s existing lines: gravel or flagstone patterns keep costs low while creating clean, defined edges.
I’ll position the paver patio where it catches evening light, so you’ll actually use this new room. Around the perimeter, I’m planning a xeriscape border with drought-tolerant plants that do well without constant watering, especially crucial here in Atlanta’s dry spells.
Permeable joints between pavers prevent pooling, and I’ll mark spaces for integrated lighting later. Your layout doesn’t need complexity; it needs intention.
Choosing Materials Wisely
With your layout sketched and dimensions in hand, I’m ready to select materials that won’t strain your budget or your back. I choose permeable pavers for their jointed design, which filters rainwater, eliminates puddles, and lets your small space breathe while recharging groundwater. In areas where grass never grew well, this hardscape approach turns limitations into strengths.
For surrounding areas, I layer in gravel landscaping to create visual continuity that feels intentional, not improvised. Crushed stone complements both sleek modern lines and classic aesthetics, while pairing naturally with boulders or rock features. I’ll use landscape fabric beneath all aggregates to block weeds permanently, and secure clean edges with sturdy edging that maintains crisp boundaries.
Together, these choices create a cohesive outdoor room that welcomes everyone.
Installation Best Practices
How do you turn raw materials into a patio that’ll last decades? I start with a solid foundation, because your outdoor space deserves permanence without the premium price tag.
| Step | Material | Purpose |
|---|---|---|
| Base Layer | Angular crushed gravel | Locking stability for load-bearing |
| Weed Barrier | Landscape fabric | Prevention of unwanted growth |
| Surface | Permeable paver | Water filtration, reduced runoff |
| Edging | Metal, stone, or wood | Containment, clean visual lines |
I excavate six to eight inches deep, making sure drainage slopes away from structures. I compact each layer progressively, never rushing the process. Permeable paver installations reward patience with decades of performance.
I select angular stone over smooth alternatives, because interlocking edges create structural integrity. Your compact yard becomes an intentional retreat, supporting drought-tolerant plantings while managing rainwater responsibly.
Create a Rock and Succulent Garden for Dry Climates
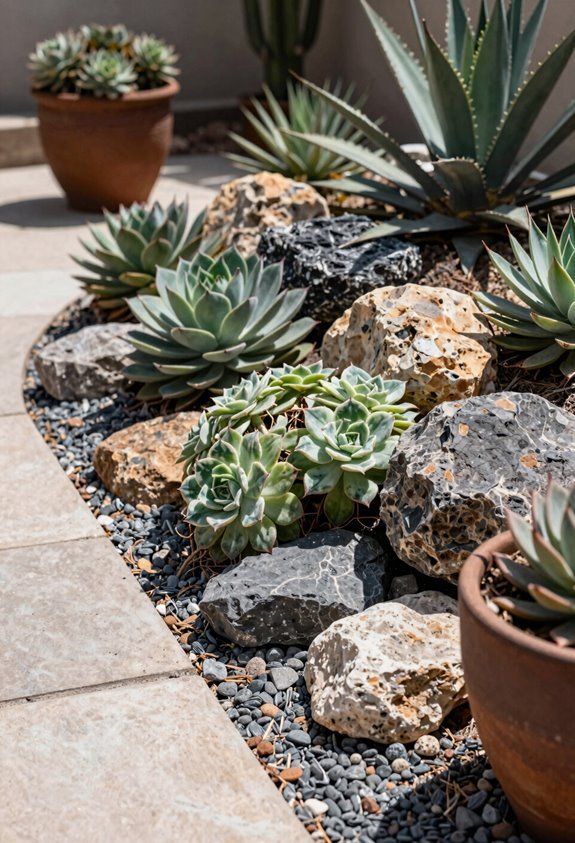
Why let a water-hungry lawn drain your resources when you can cultivate something striking that actually survives on neglect? I’m embracing xeriscaping principles, and I’ve found that rocks and succulents turn parched yards into sculptural sanctuaries.
You’ll want varied stones—gravel, river rock, and boulders—to build texture while shielding soil from harsh sun. I select succulents matched to my region’s heat patterns, so they’ll flourish through blistering summers with minimal intervention.
Well-draining cactus mix prevents root rot, and shallow raised beds or ground pockets improve drainage where I need it most. Light stones reflect heat; dark ones create dramatic contrast. A thin mulch layer locks in moisture and blocks weeds. Together, we’re building resilient beauty that respects both climate and budget.
Plant a Wildlife Habitat That Attracts Pollinators
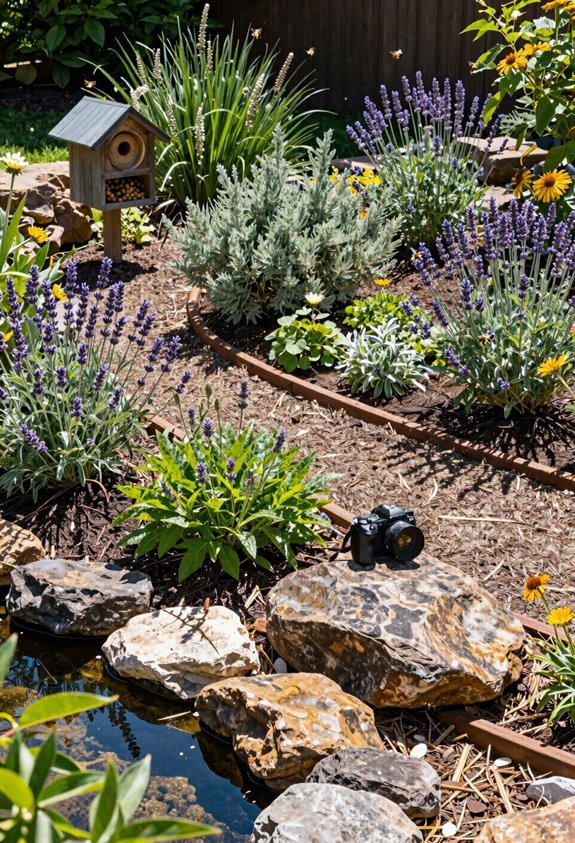
I’ve found that building a pollinator haven starts with three fundamentals: selecting regional flora adapted to your hardiness zone, installing accessible hydration stations, and engineering layered vegetative cover. Native perennials with sequential bloom periods anchor the food web, while shallow dish fountains or muddy margins address critical water needs.
Dense shrub thickets and undisturbed ground layers complete the habitat matrix, offering thermal refuge and nesting substrates for solitary bees and overwintering lepidoptera.
Choosing Native Plants
Where might you begin when replacing a lawn with something alive? I start with native plants, because they’ve already done the hard work of adapting to your exact region. You plant species that evolved alongside your soil and weather patterns, and suddenly water conservation becomes effortless. No more battling against nature with sprinklers running constantly.
I mix native flowers, shrubs, and trees to build genuine habitat. Bees and butterflies arrive almost immediately, drawn to blooms they recognize. You skip mowing forever, use minimal fertilizer, and observe your yard become living infrastructure.
Local biodiversity strengthens, crop yields in neighboring gardens improve, and you belong to something regenerative. Year-round forage sustains wildlife through every season.
Providing Water Sources
Native plants draw pollinators in, but they’ll stick around when you give them water they’ll actually use. I create a true wildlife habitat by tucking in small water features throughout my yard: shallow dishes with pebbles let butterflies sip safely, while a simple bird bath serves hummingbirds and bees alike. I group these near my nectar-rich plantings so everything’s accessible. I also practice hydrozoning by clustering moisture-loving species close to the water sources, which keeps my habitat viable without wasting resources.
Where Atlanta’s heat bears down, I rely on drought-tolerant natives that need less irrigation but still support my pollinator community. When I add a basic bird feeder beside these water stations, I’m building genuine biodiversity. Sustenance and hydration work together to make my yard somewhere wildlife truly belongs.
Creating Shelter Spaces
How do you turn a bare yard into a refuge that wildlife actually needs? I build a layered habitat that welcomes pollinators and gives them reasons to stay. I plant native flowers, shrubs, and trees for year-round food, then add groundcovers, taller growth, and small trees to create varied shelter heights. I tuck in logs, fallen branches, and rock piles for overwintering sites and protective microhabitats.
I include berry-producing plants, a shallow bird bath, and nesting boxes so every species finds its place. I skip chemical pesticides, choosing habitat-friendly irrigation and mulch instead. This shelter-rich ecosystem makes my yard a place of belonging, for me, and for the wildlife I host.
Build Raised Beds for Vegetables and Herbs
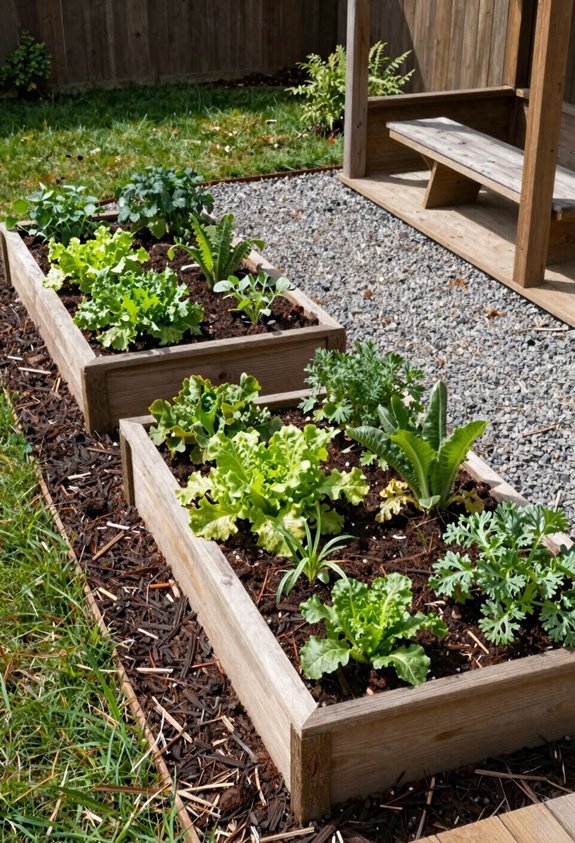
Why limit your harvest to what traditional ground plots allow when raised beds open up so much room for possibility in tight spaces? I’ve reshaped my own compact yard using raised beds and containers, and you’ll find these elevated solutions provide remarkable control over soil quality and drainage. The height eliminates back-breaking bending, making daily tending a pleasure rather than a chore.
You’ll rotate crops seasonally without disrupting established root systems, while vertical trellises train climbing beans and tomatoes upward, using every square foot to full advantage.
| Bed Type | Best For | Key Advantage |
|---|---|---|
| Wooden frames | Deep-rooted vegetables | Cost-effective, customizable sizing |
| Fabric containers | Herbs, shallow greens | Portable, excellent aeration |
| Cinder block | Perennial herbs | Built-in thermal mass, durability |
| Galvanized stock tanks | Root vegetables | Predrilled drainage, longevity |
| Tiered planters | Mixed herb collections | Vertical efficiency, visual appeal |
Pair your setup with drip irrigation and mulch; you’ll conserve water while keeping maintenance low in your grass-free haven.
Design a Zen Garden Retreat on a Tight Budget
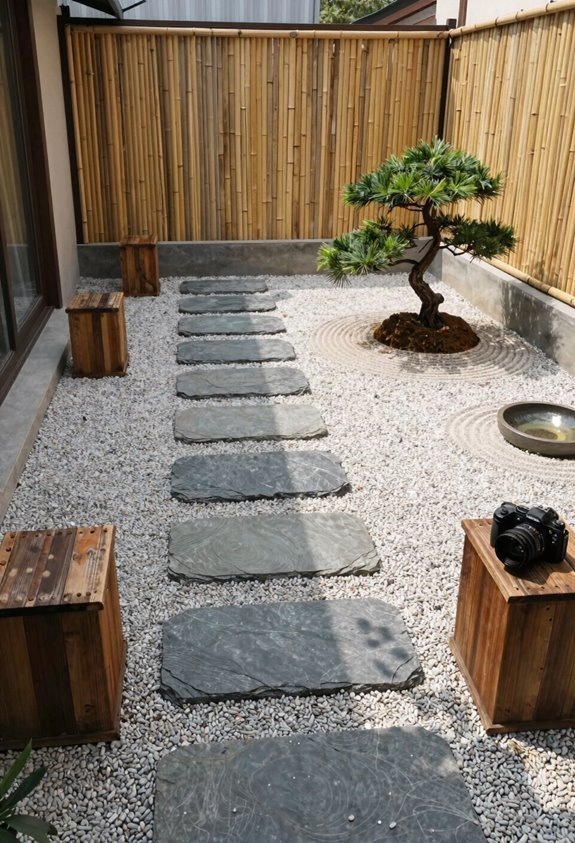
I’ll create a purposeful Zen garden by combining minimalist gravel beds with select focal stones and a single bamboo fountain to anchor the meditation space. You won’t need expensive installations to achieve tranquility. Budget-friendly raked patterns and natural negative space create that essential sense of harmony.
I’ll show you how strategic placement of low-cost elements, like repurposed smooth river stones and simple solar path lights, extends your retreat’s peaceful ambiance well past sunset without cluttering the sightlines.
Zen Garden Basics
Where else can you carve out genuine peace without breaking your budget? I build my Zen garden around gravel and sand, raking deliberate patterns that settle my mind after demanding days. This approach delivers low-maintenance tranquility through strategic rock placement and negative space that breathes.
I select sparse, drought-tolerant plantings that respect the gravel’s dominance without thirsty demands. Non-deep-rooted specimens prevent disruption while preserving clean lines and balance. My focal point, perhaps a simple stone lantern or modest bamboo fountain, anchors the composition without costly complexity.
The rhythm of regular raking becomes meditative maintenance, refreshing patterns that weather and shift. No lawn demands my attention. Instead, I cultivate restraint, harmony, and belonging in compact quarters through thoughtful restraint and purposeful emptiness.
Budget-Friendly Elements
How do I create genuine serenity without draining my savings? I start with gravel or sand as my canvas, adding carefully placed rocks and sparse, low-maintenance plantings that bring harmony without demanding constant attention.
I skip expensive water features. Instead, I choose a simple bamboo fountain or a stone lantern for that same calming effect. Native, drought-tolerant plants become my allies; they flourish with minimal intervention and slash my irrigation bills.
Ground cover and clean edging define my space beautifully, while eliminating grass means I never mow or fertilize again. I build my retreat in stages: modular rock groupings today, mulch around plantings tomorrow. Each element scales as my budget allows.
This approach belongs to anyone craving peace without pretense.
Add a Basic Grill Station for Under $500
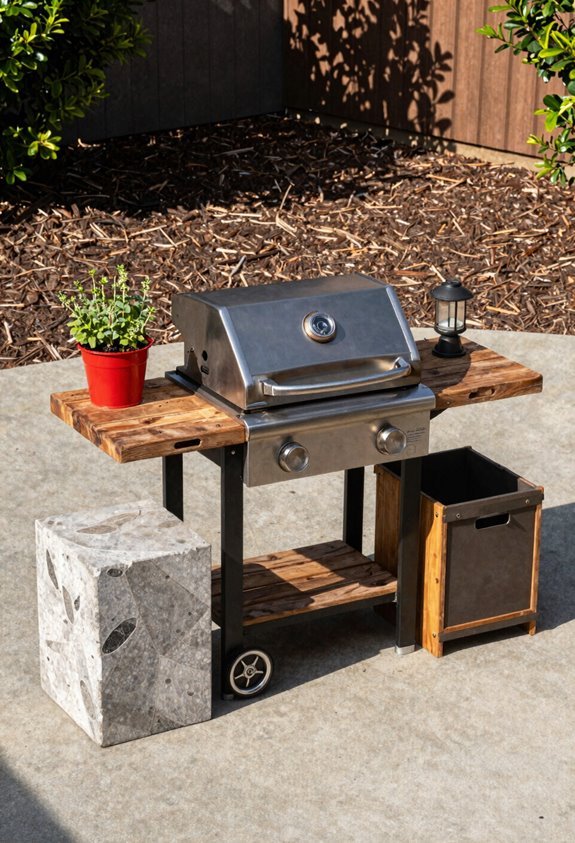
A well-designed grill station doesn’t demand deep pockets or sprawling square footage to deliver serious outdoor cooking capability. I’ve built functional outdoor kitchen setups for under $500 using compact built-in grills paired with concrete or stainless steel countertops measuring 28–36 inches wide. Weather-resistant grills, sealed surfaces, and inexpensive weatherproof cabinets create a proper cooking zone without breaking budgets.
I recommend concrete pavers or composite tiles to define your station’s footprint, which complements front yard landscaping transitions when spaces flow together. Essential safety matters: proper ventilation, fireproof heat shields, nearby water access, and dedicated fuel lines with shut-off valves. Optional under-counter carts, side shelves, or small coolers fit within budget constraints. This approach changes modest spaces into real culinary gathering spots your guests will appreciate.
Build a Backyard Play Space With Logs, Boulders, and Sand
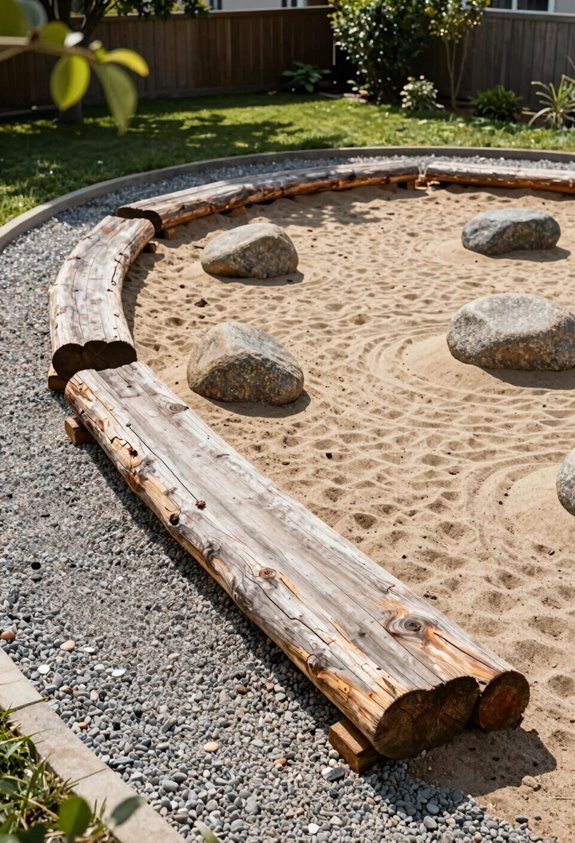
Transform your yard into a dynamic play environment using raw, natural materials that spark creativity and physical development without manufactured equipment costs. I position logs and boulders strategically to create climbing challenges and balance zones that grow with your children. You’ll want to carve out a dedicated sand area with sturdy edging; this sensory zone invites digging, building, and collaborative play while keeping the material contained.
I always place soft surfacing like mulch beneath any elevated elements to cushion falls and welcome kids of all abilities. Position your play space where you can supervise from the house or garden beds, yet separate enough to preserve quiet relaxation zones. This natural approach builds community connection through shared outdoor experiences, proving that meaningful childhood memories don’t require expensive manufactured structures.
Mix Ground Covers and Containers for a Layered, Cheap Yard
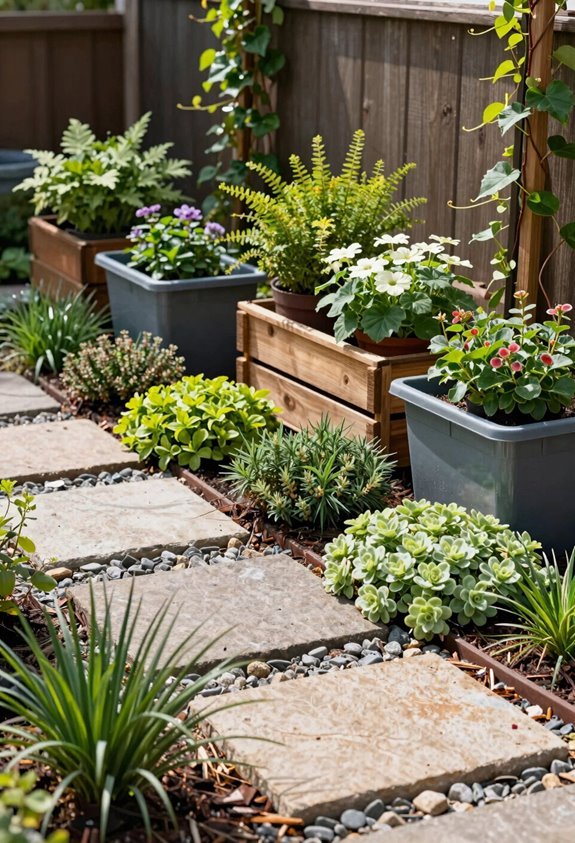
Why settle for flat, one-dimensional landscaping when you can build vertical depth without breaking your budget? I combine low-growing ground covers with elevated containers to maximize every inch of my no-grass yard, creating distinct layers that feel intentional and welcoming. This approach suppresses weeds, slashes maintenance, and lets me swap seasonal colors without disrupting the overall design.
Here is how I build my layered space:
- I select sun-loving ground covers like creeping thyme, then tuck shade-tolerant varieties beneath taller containers for visual contrast.
- I group containers in odd numbers to establish natural zones that draw the eye upward.
- I position vessels on permeable surfaces, ensuring drainage compatibility with surrounding plantings.
- I mulch around ground covers to lock moisture and prevent runoff.
My small urban yard finally feels cohesive, budget-friendly, and personal.





